

Сделай сам выпуск денег леев для празднования значимой вехой
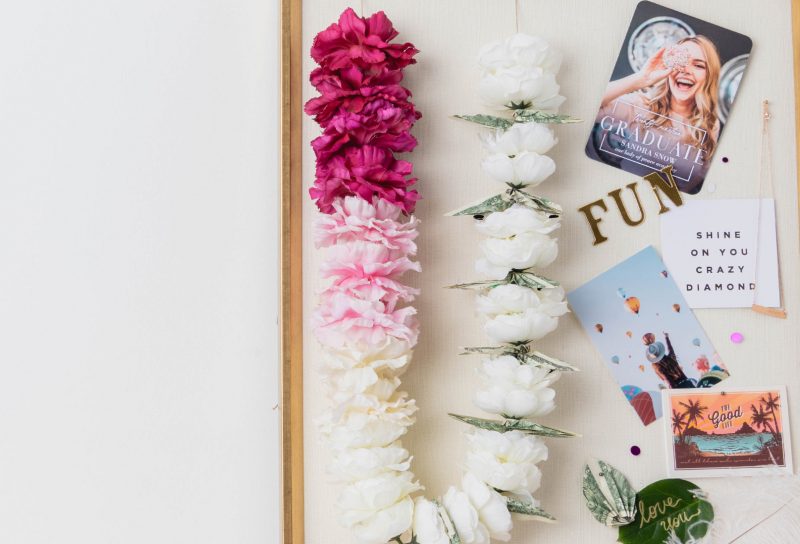
Объявления об окончании школы уже вышли, и приглашения были заказаны. Теперь пришло время выпускнику почувствовать себя особенным в этот знаменательный день с денежным леем. Цветочные Леи традиционно даются в знак привязанности, когда человек приезжает или уезжает, поэтому выпускной денежный лей идеально подходит для тех, кто вступает на новый этап в жизни.
Знакомства Любимых Клиентов


Самое приятное, что вы можете полностью сделать это сами. Там нет необходимости искать идеи выпускных денег lei, потому что мы сделали всю работу за вас. Будь то подарок будущему выпускнику в вашей жизни или создание его для вашего собственного выпускного дня, следуйте нашим простым инструкциям DIY ниже для уникального Лея, который, несомненно, принесет улыбки в этот большой день. Этот учебник money lei покажет вам, как нанизывать цветы и складывать долларовые купюры в форме листа.
Как заработать деньги на выпускной Лей
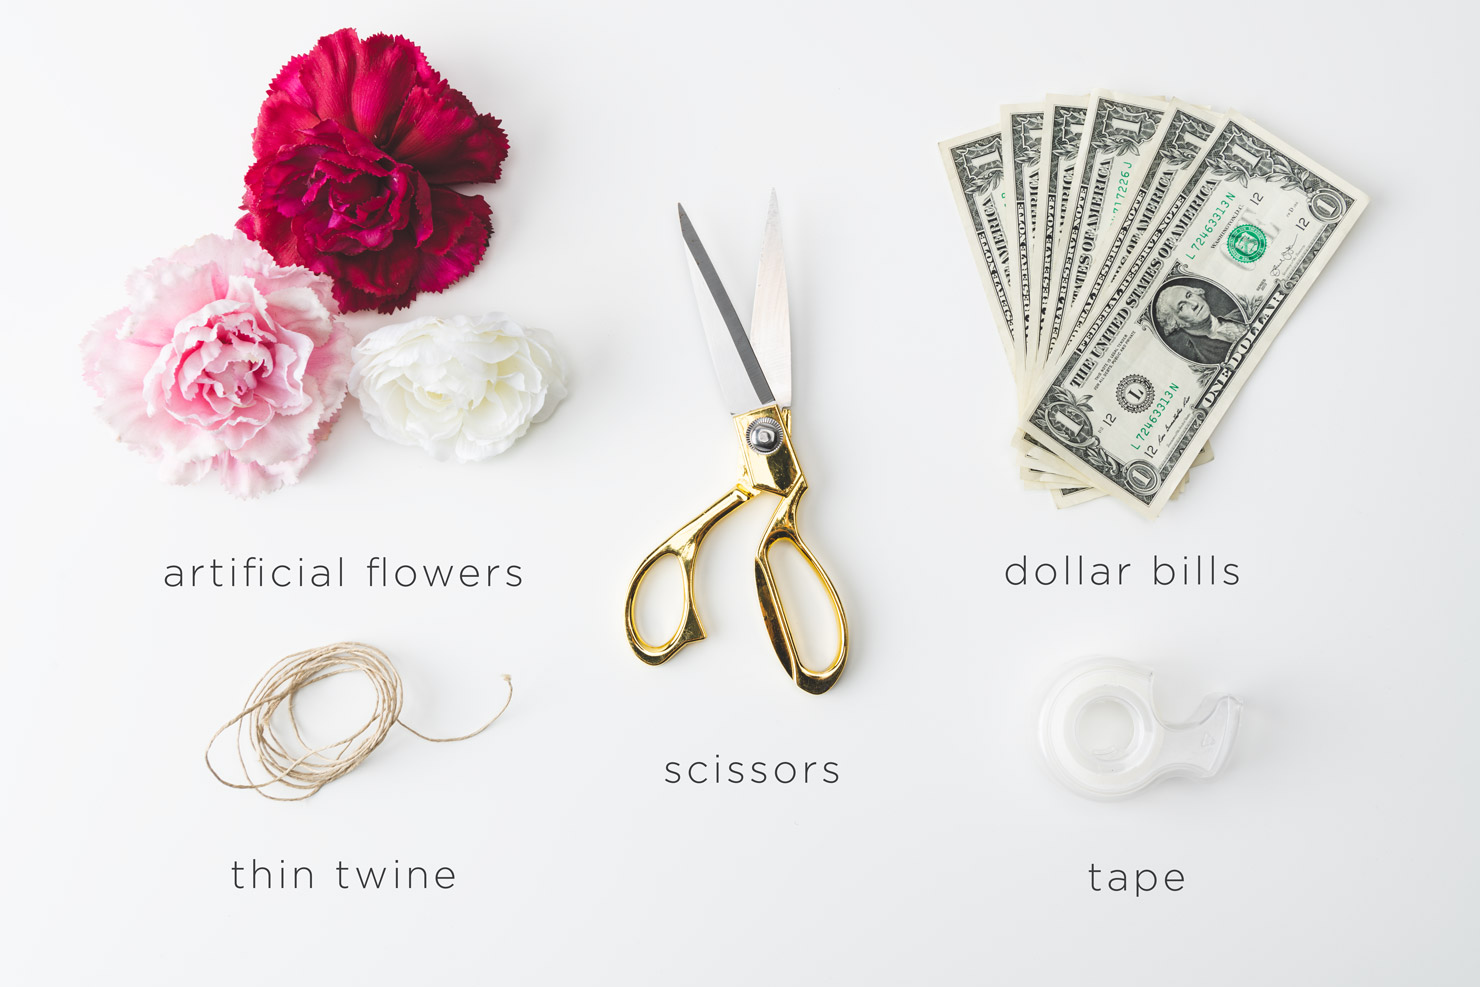
Вы можете легко найти материалы, которые вам нужны, когда вы ходите по магазинам для декора выпускного вечера. Мы использовали 28 искусственных цветов, но вы можете использовать меньше или больше в зависимости от типа цветов, которые вам нравятся, и от того, насколько низко вы хотите повесить лей. Использование двух или трех цветов приветствуется — возможно, вы можете смешать школьные цвета, чтобы придать ему уникальный и праздничный вид. Это зависит от вас, какие купюры вы хотели бы использовать, но мы использовали 20 однодолларовых купюр.
 %3Csvg%20xmlns=%22http://www.w3.org/2000/svg%22%20viewBox=%220%200%201480%20987%22%3E%3C/svg%3E' data-src="/image-russeler/uploads/2019/02/DIY-money-lei-materials.jpg" alt="scissors money twine flowers and tape" data-srcset="/image-russeler/uploads/2019/02/DIY-money-lei-materials.jpg 1480w, https://1e8l7s2d5d0c6s5fz1gc4uh1-wpengine.netdna-ssl.com/wp-content/uploads/2019/02/DIY-money-lei-materials-300x200.jpg 300w, https://1e8l7s2d5d0c6s5fz1gc4uh1-wpengine.netdna-ssl.com/wp-content/uploads/2019/02/DIY-money-lei-materials-768x512.jpg 768w, https://1e8l7s2d5d0c6s5fz1gc4uh1-wpengine.netdna-ssl.com/wp-content/uploads/2019/02/DIY-money-lei-materials-1024x683.jpg 1024w, https://1e8l7s2d5d0c6s5fz1gc4uh1-wpengine.netdna-ssl.com/wp-content/uploads/2019/02/DIY-money-lei-materials-800x534.jpg 800w, https://1e8l7s2d5d0c6s5fz1gc4uh1-wpengine.netdna-ssl.com/wp-content/uploads/2019/02/DIY-money-lei-materials-24x16.jpg 24w, https://1e8l7s2d5d0c6s5fz1gc4uh1-wpengine.netdna-ssl.com/wp-content/uploads/2019/02/DIY-money-lei-materials-36x24.jpg 36w, https://1e8l7s2d5d0c6s5fz1gc4uh1-wpengine.netdna-ssl.com/wp-content/uploads/2019/02/DIY-money-lei-materials-48x32.jpg 48w" data-sizes="(max-) 100vw, 1480px" />
Not only is this a fun project to work on, this money lei will definitely be a favorite part of graduation along with some unique graduation gifts.
- Thin twine
- Artificial flowers
- Scissors
- Dollar bills
- Tape
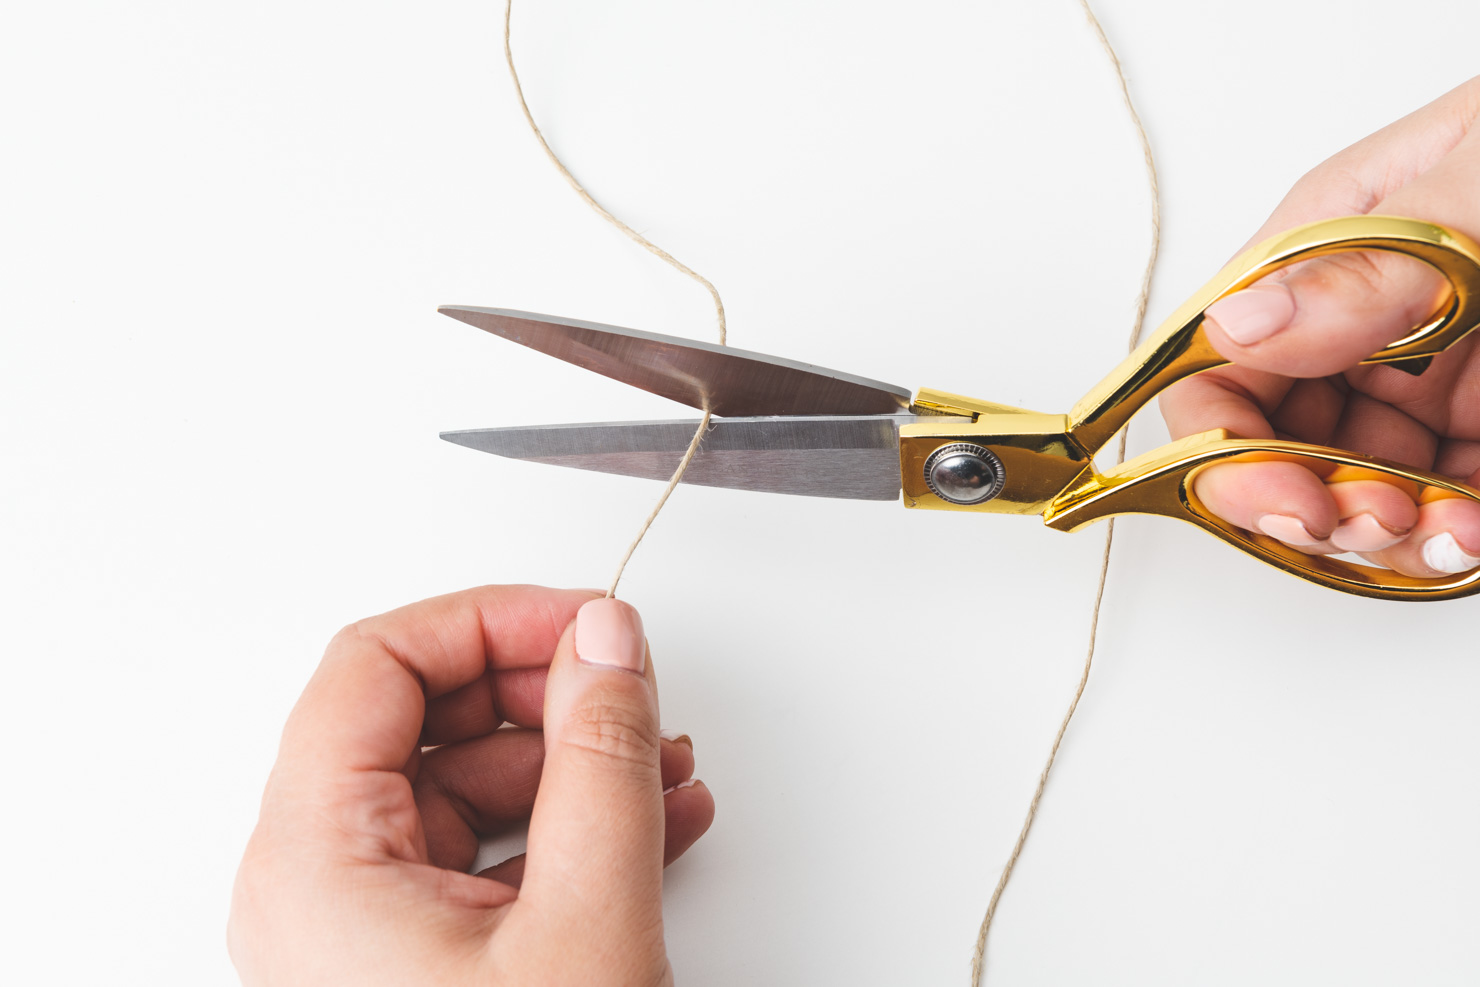
Step 1: Measure the string to your desired length and cut. We recommend using the thinnest twine you can find since you’ll be stringing flowers through it.
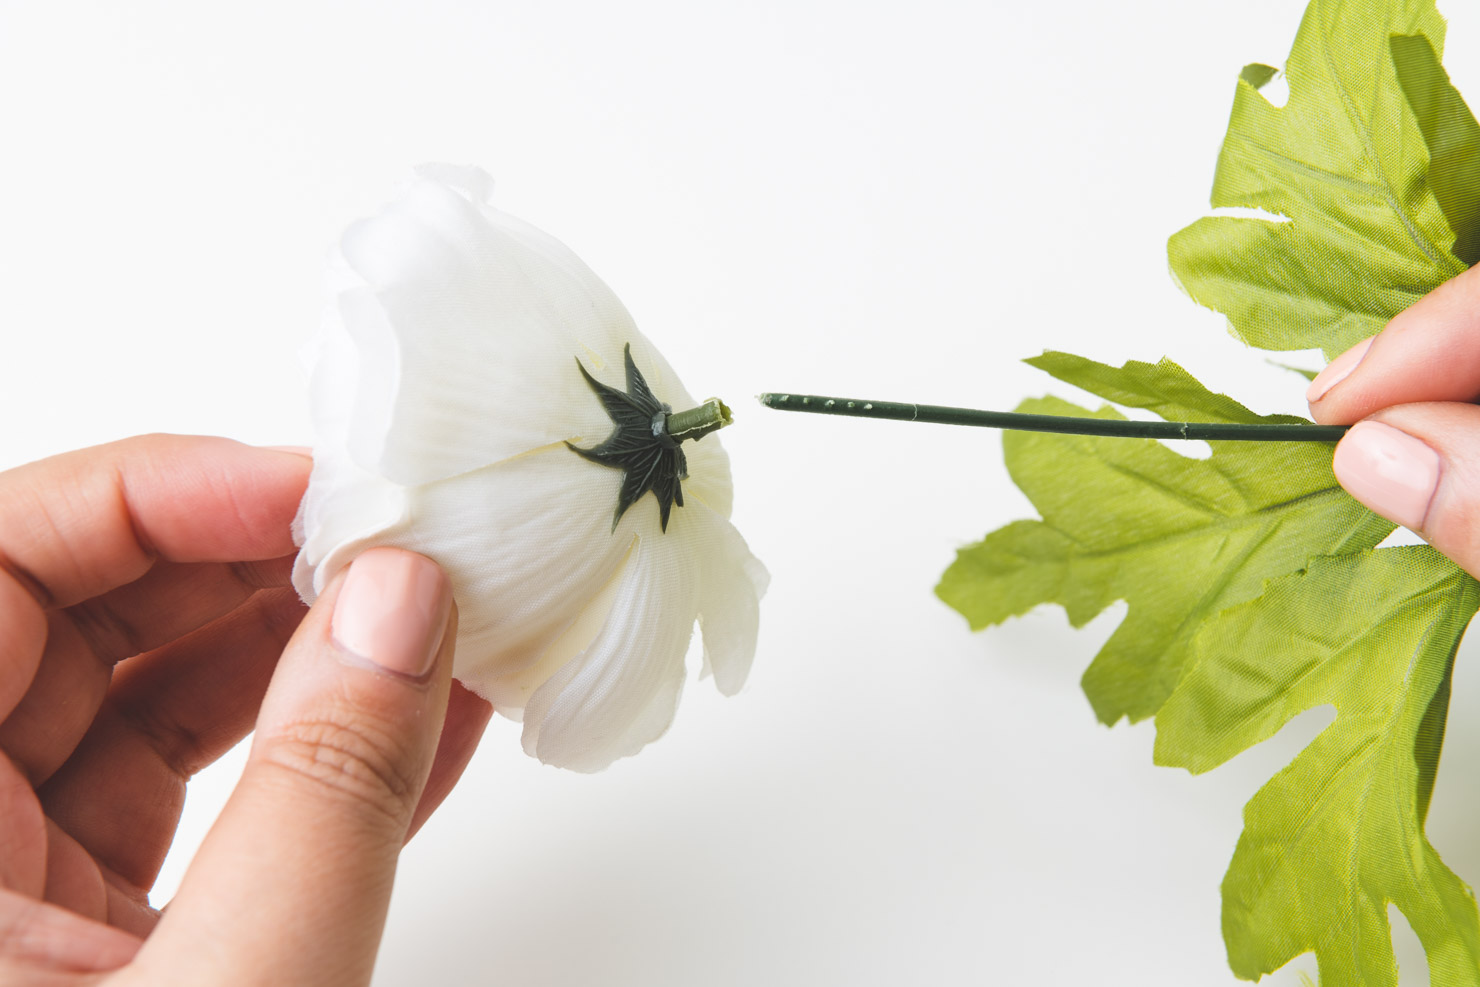
Step 2: Remove your flower from the stem. When using artificial flowers, it’s easy to just give them a pull. Make sure you test at the store before purchasing, since some flowers are not detachable. We used 28 flowers — as mentioned, this may vary depending on the types of flowers you purchase and length of the lei.

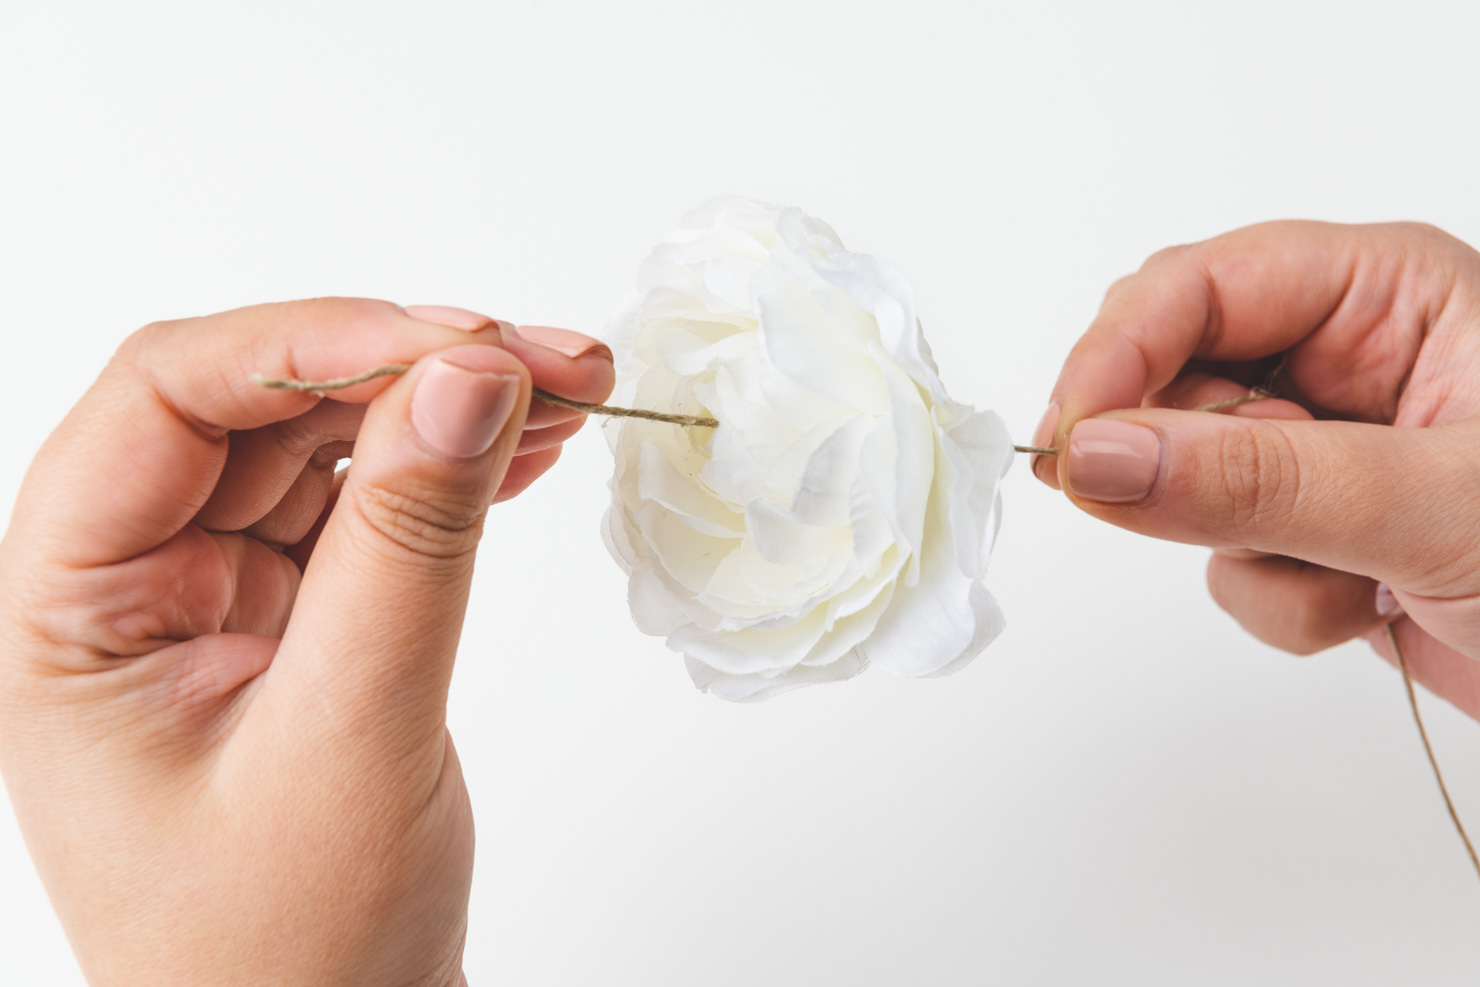
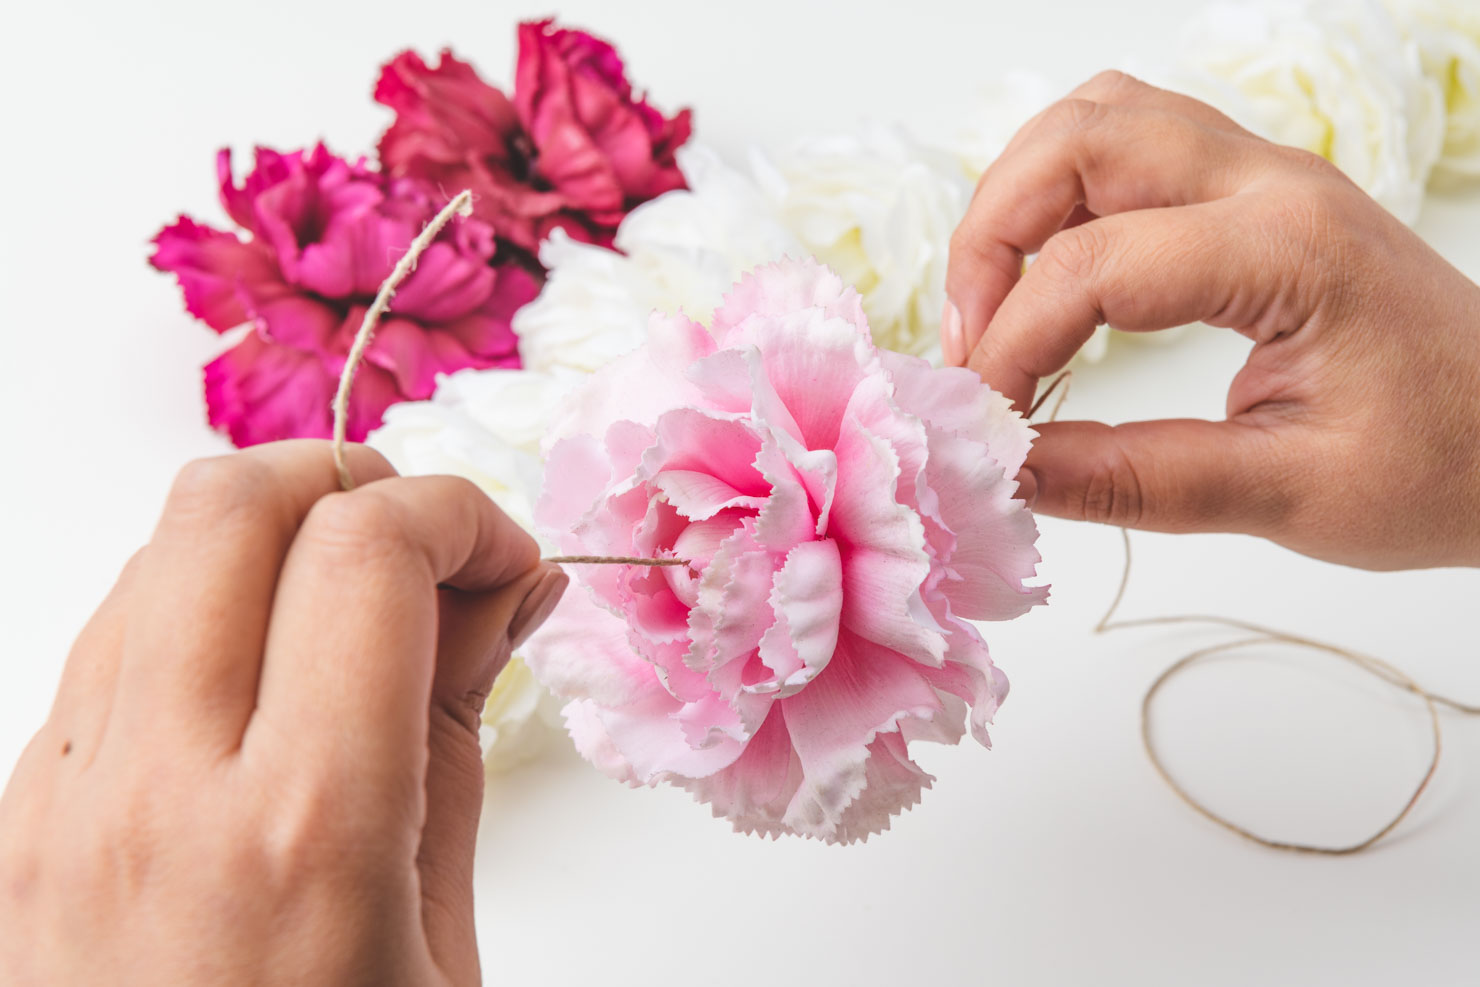
Шаг 3: проденьте свой цветок через нижнюю часть. Веревка должна пройти прямо через другую сторону.
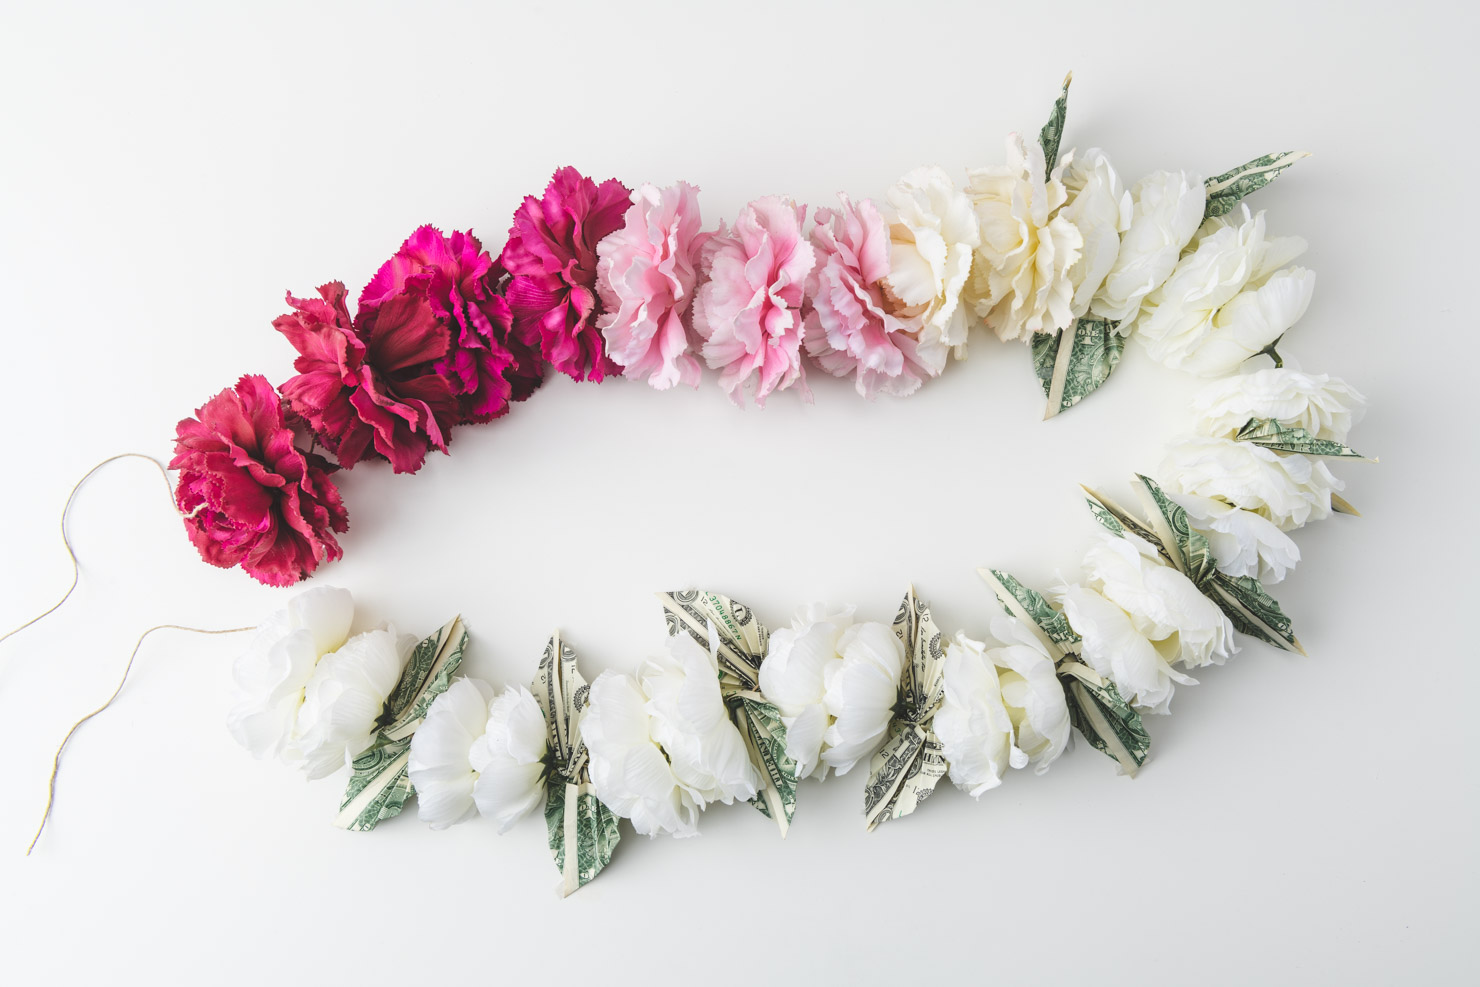
Шаг 4: Повторите со всеми цветами и отложите в сторону. Забавный узор, который нужно попробовать, - это от самого светлого до самого темного для эффекта омбре.
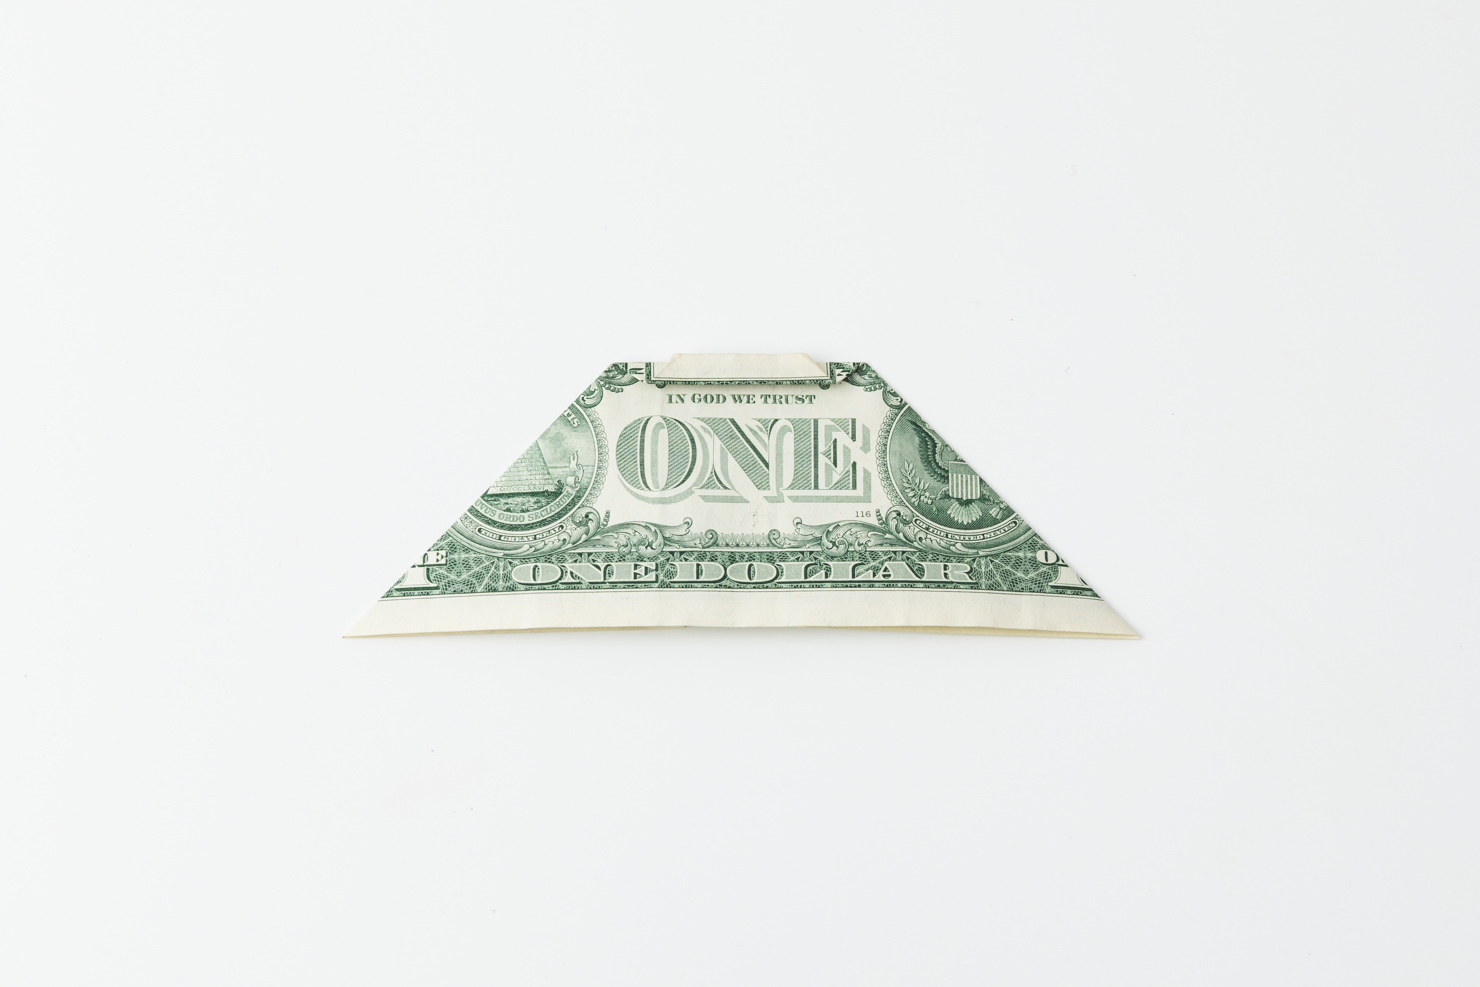
Шаг 5: сложите каждую сторону вашей долларовой купюры под прямым углом. Не имеет значения, с какой стороны вы решили начать. Вы будете складывать счет по много раз.
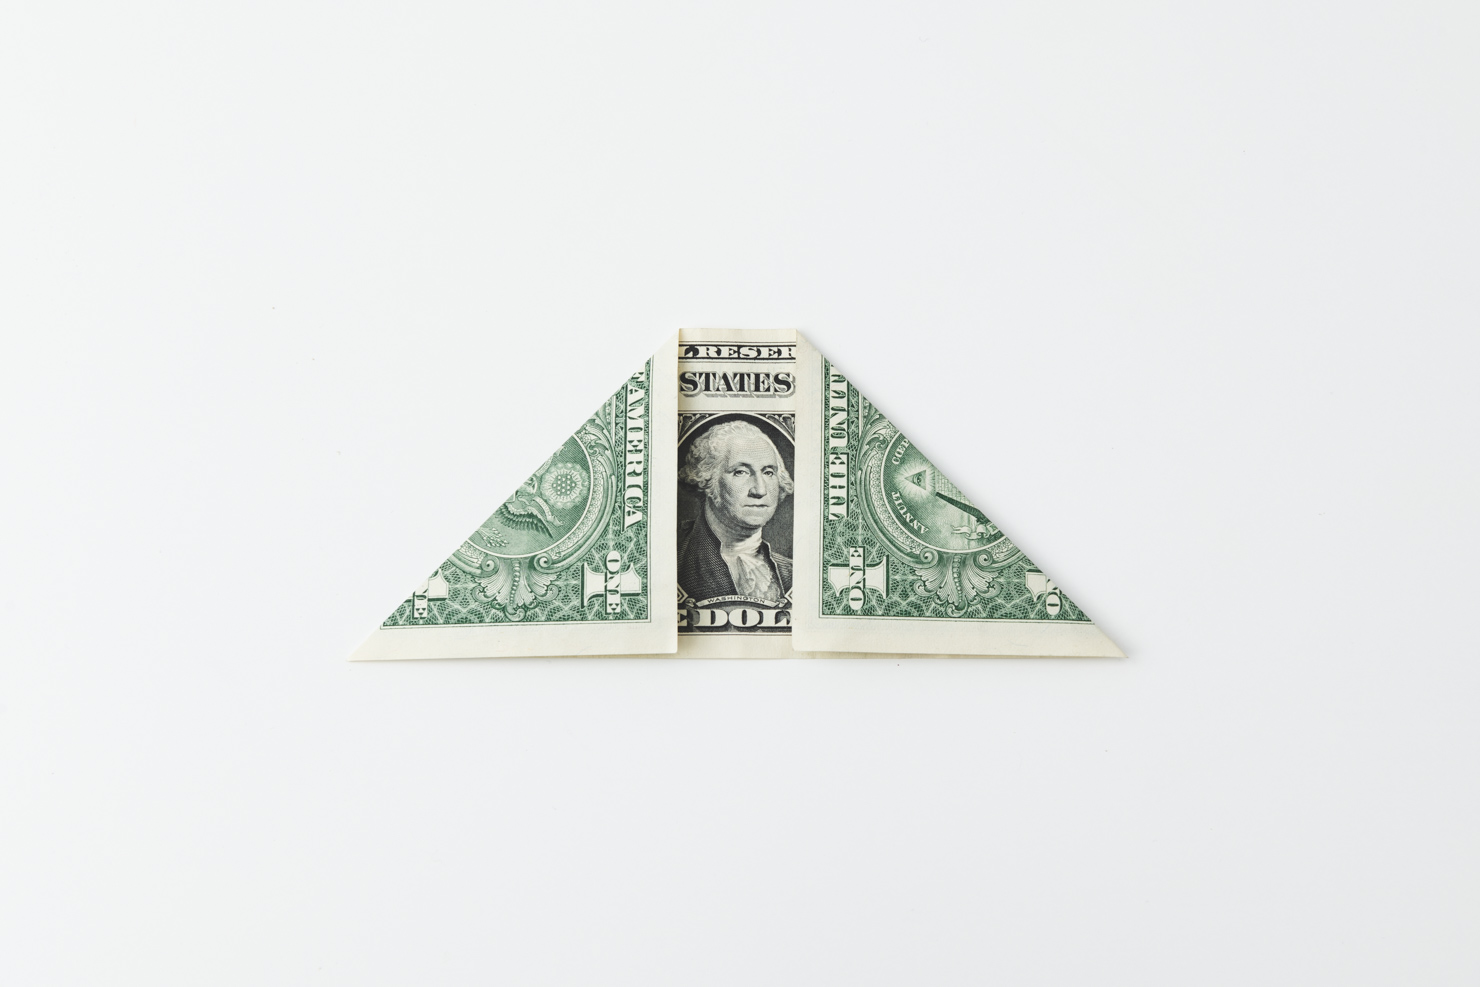
Шаг 6: Возьмите самую верхнюю часть купюры и сложите ее. Пусть вас ведет пустое пространство — оно должно быть около четверти дюйма.
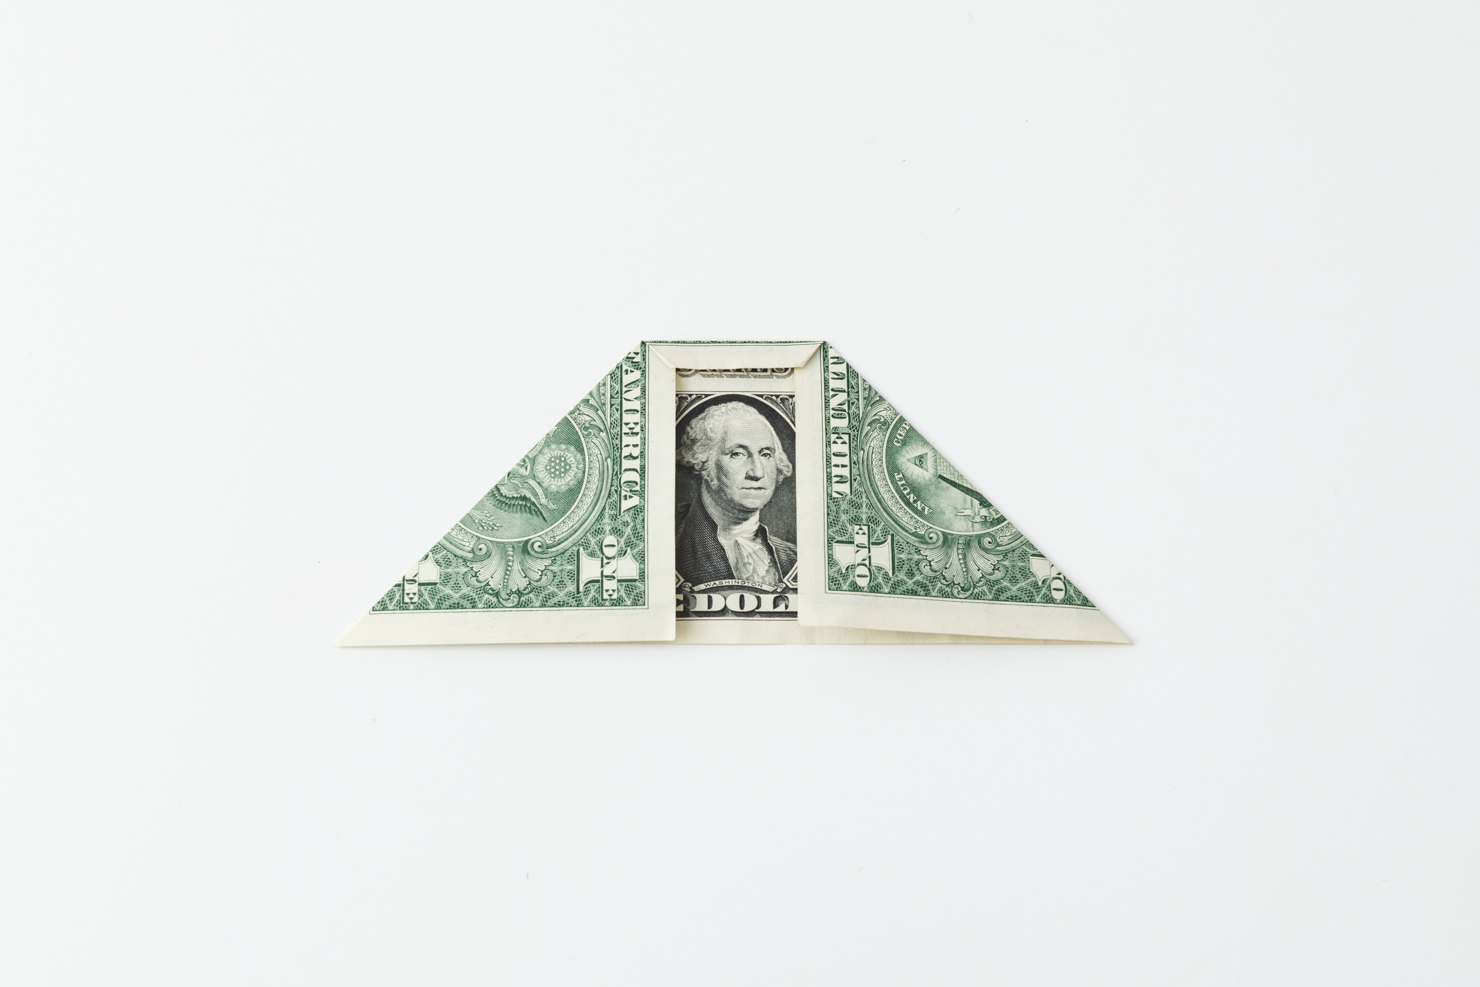
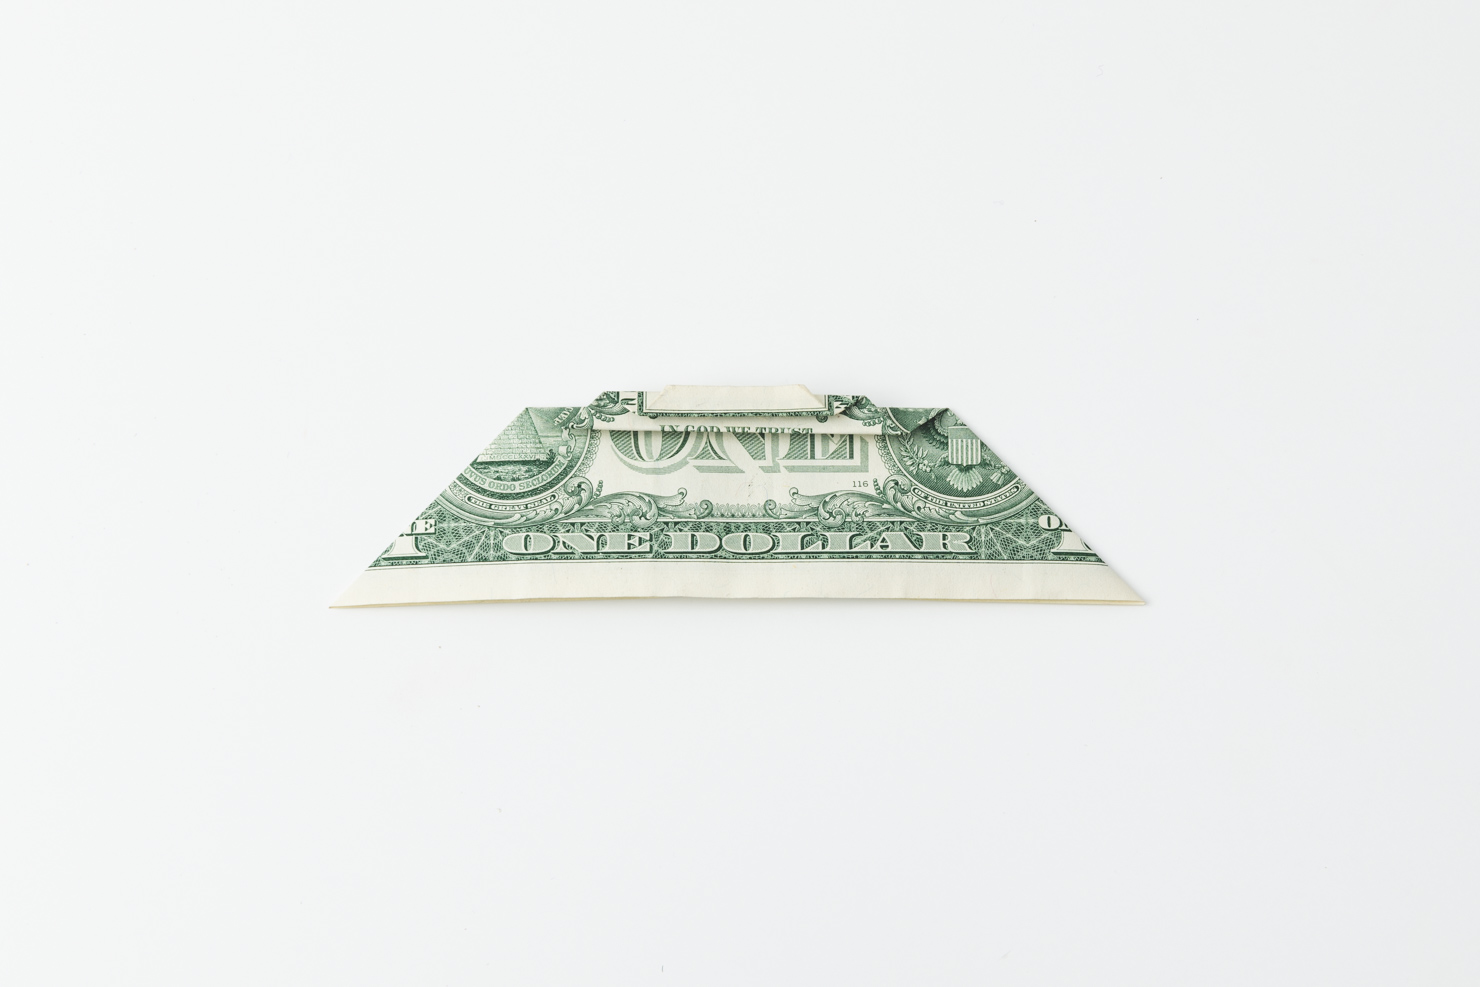
Шаг 7: Переверните купюру и повторите предыдущий шаг. При складывании все складки должны быть точно такого же размера.
Шаг 8: переверните еще раз и сложите верхнюю часть. Вы заметите, что начинаете создавать эффект лестницы, если смотреть на нее сбоку.

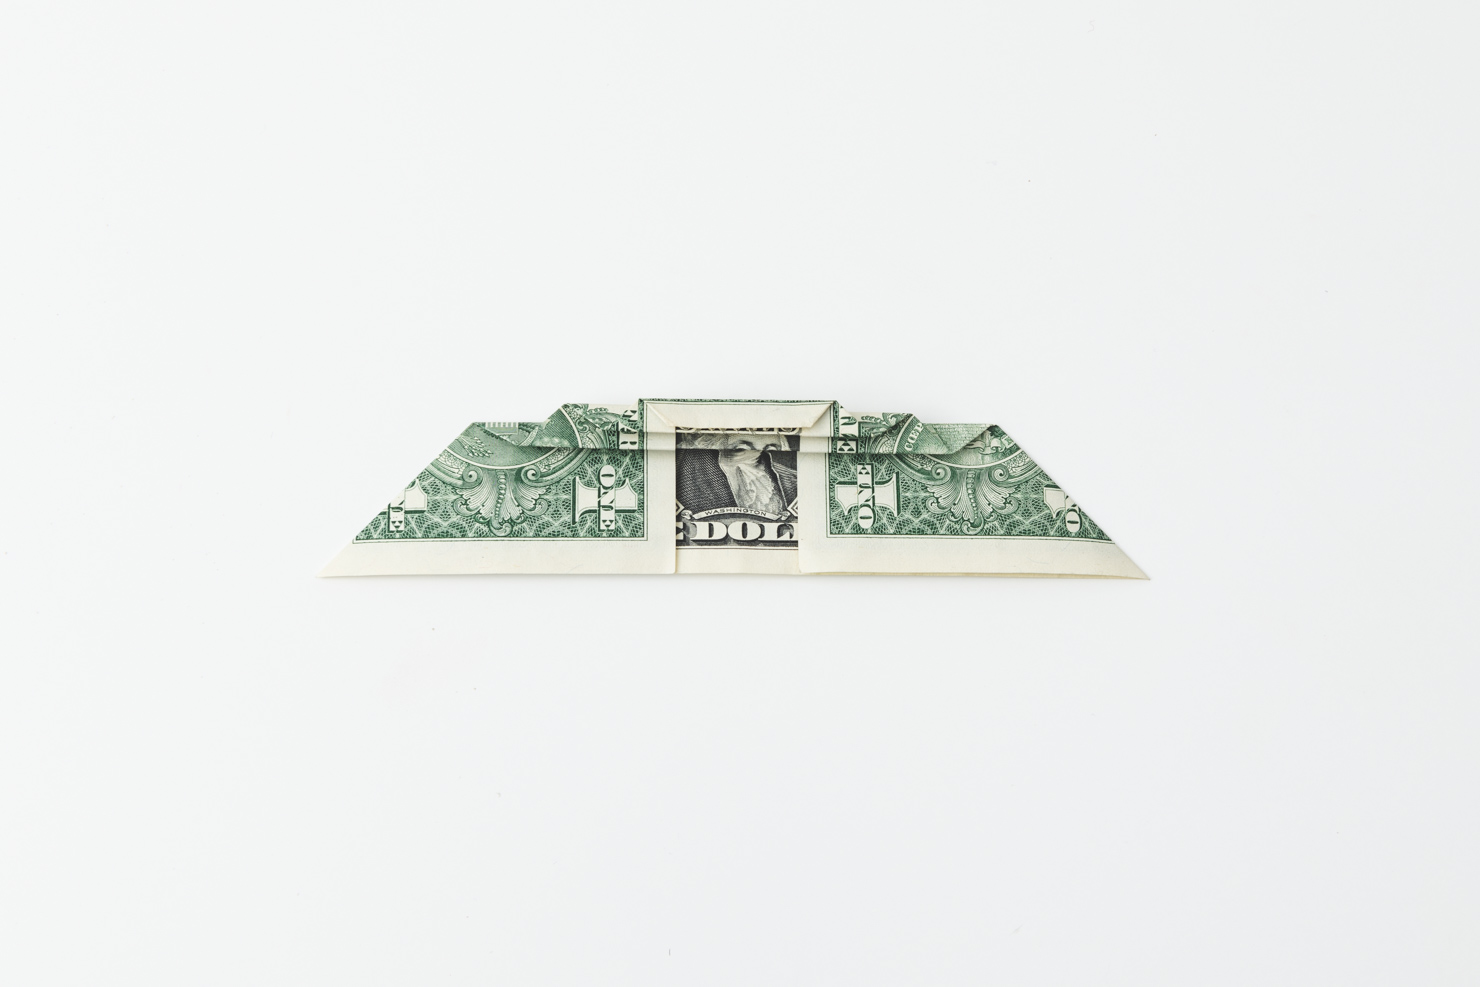
Step 9: Flip again and fold the top over. All edges should be folded neatly. To accomplish this, reinforce the fold by pressing and sliding your finger against it.
Step 10: Keep repeating this step until you’ve reached the bottom of the bill.
 Шаг 11: после завершения работы у вас должно быть что-то похожее на это.
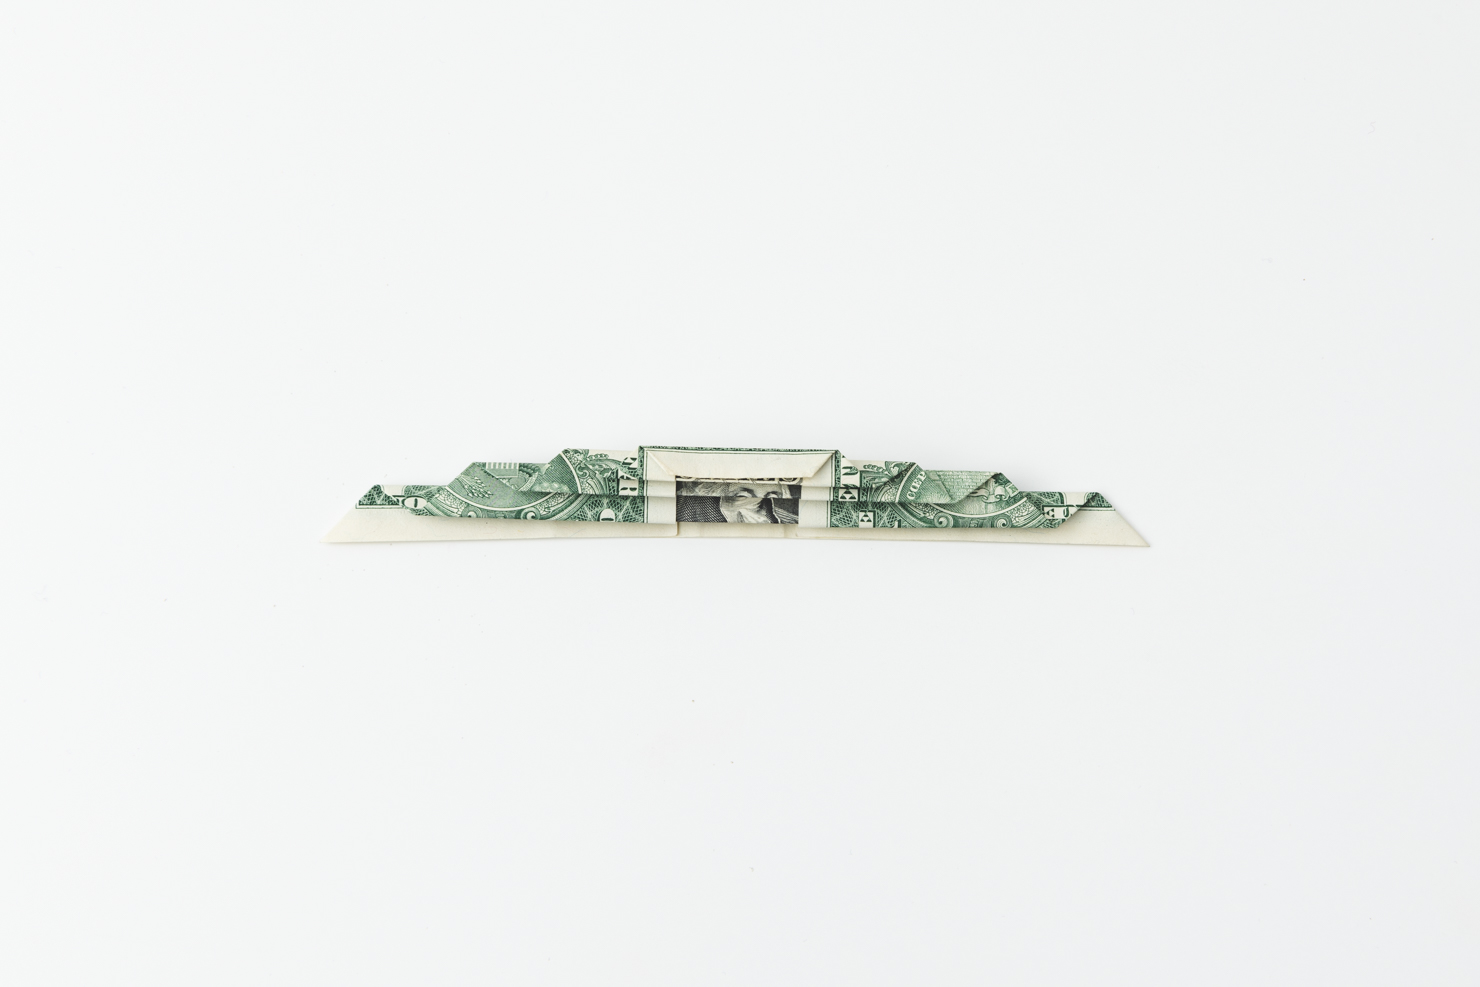
Шаг 12: Сложите углы вашего счета вместе и закройте. Мы использовали ленту, чтобы закрепить оба конца, и обнаружили, что обычная лента работает лучше, чем двусторонняя, хотя ни одна из лент не повреждает счета.
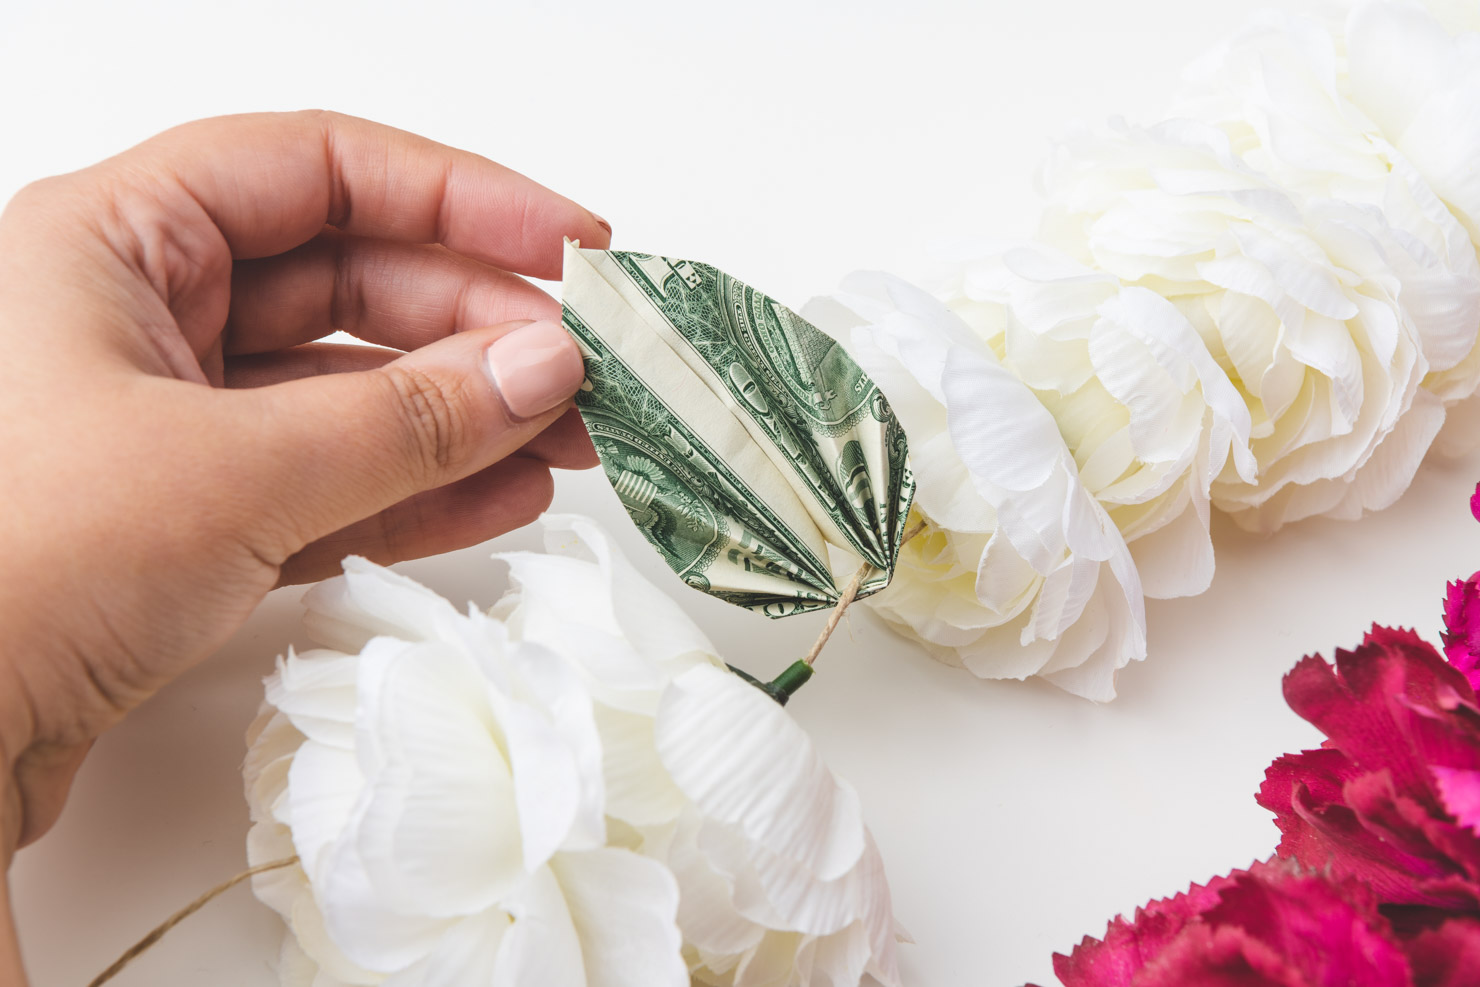
Шаг 13: добавляем еще листья. Вы можете сделать одиночные или двойные листья на цветок.
 gc4uh1-wpengine.netdna-ssl.com/wp-content/uploads/2019/02/DIY-money-lei-step-13.jpg" alt="woman placing dollar bills on a lei" data-srcset="https://1e8l7s2d5d0c6s5fz1gc4uh1-wpengine.netdna-ssl.com/wp-content/uploads/2019/02/DIY-money-lei-step-13.jpg 1480w, https://1e8l7s2d5d0c6s5fz1gc4uh1-wpengine.netdna-ssl.com/wp-content/uploads/2019/02/DIY-money-lei-step-13-300x200.jpg 300w, https://1e8l7s2d5d0c6s5fz1gc4uh1-wpengine.netdna-ssl.com/wp-content/uploads/2019/02/DIY-money-lei-step-13-768x512.jpg 768w, https://1e8l7s2d5d0c6s5fz1gc4uh1-wpengine.netdna-ssl.com/wp-content/uploads/2019/02/DIY-money-lei-step-13-1024x683.jpg 1024w, https://1e8l7s2d5d0c6s5fz1gc4uh1-wpengine.netdna-ssl.com/wp-content/uploads/2019/02/DIY-money-lei-step-13-800x534.jpg 800w, https://1e8l7s2d5d0c6s5fz1gc4uh1-wpengine.netdna-ssl.com/wp-content/uploads/2019/02/DIY-money-lei-step-13-24x16.jpg 24w, https://1e8l7s2d5d0c6s5fz1gc4uh1-wpengine.netdna-ssl.com/wp-content/uploads/2019/02/DIY-money-lei-step-13-36x24.jpg 36w, https://1e8l7s2d5d0c6s5fz1gc4uh1-wpengine.netdna-ssl.com/wp-content/uploads/2019/02/DIY-money-lei-step-13-48x32.jpg 48w" data-sizes="(max-) 100vw, 1480px" />
Step 14: Finish the lei. We added bills around every two flowers but you can choose to place them around every other depending on how many bills you have. As a reference, we used 20 bills to make the leaves for this project. When placing on the graduate or yourself, simply tie the ends around your neck and adjust accordingly.
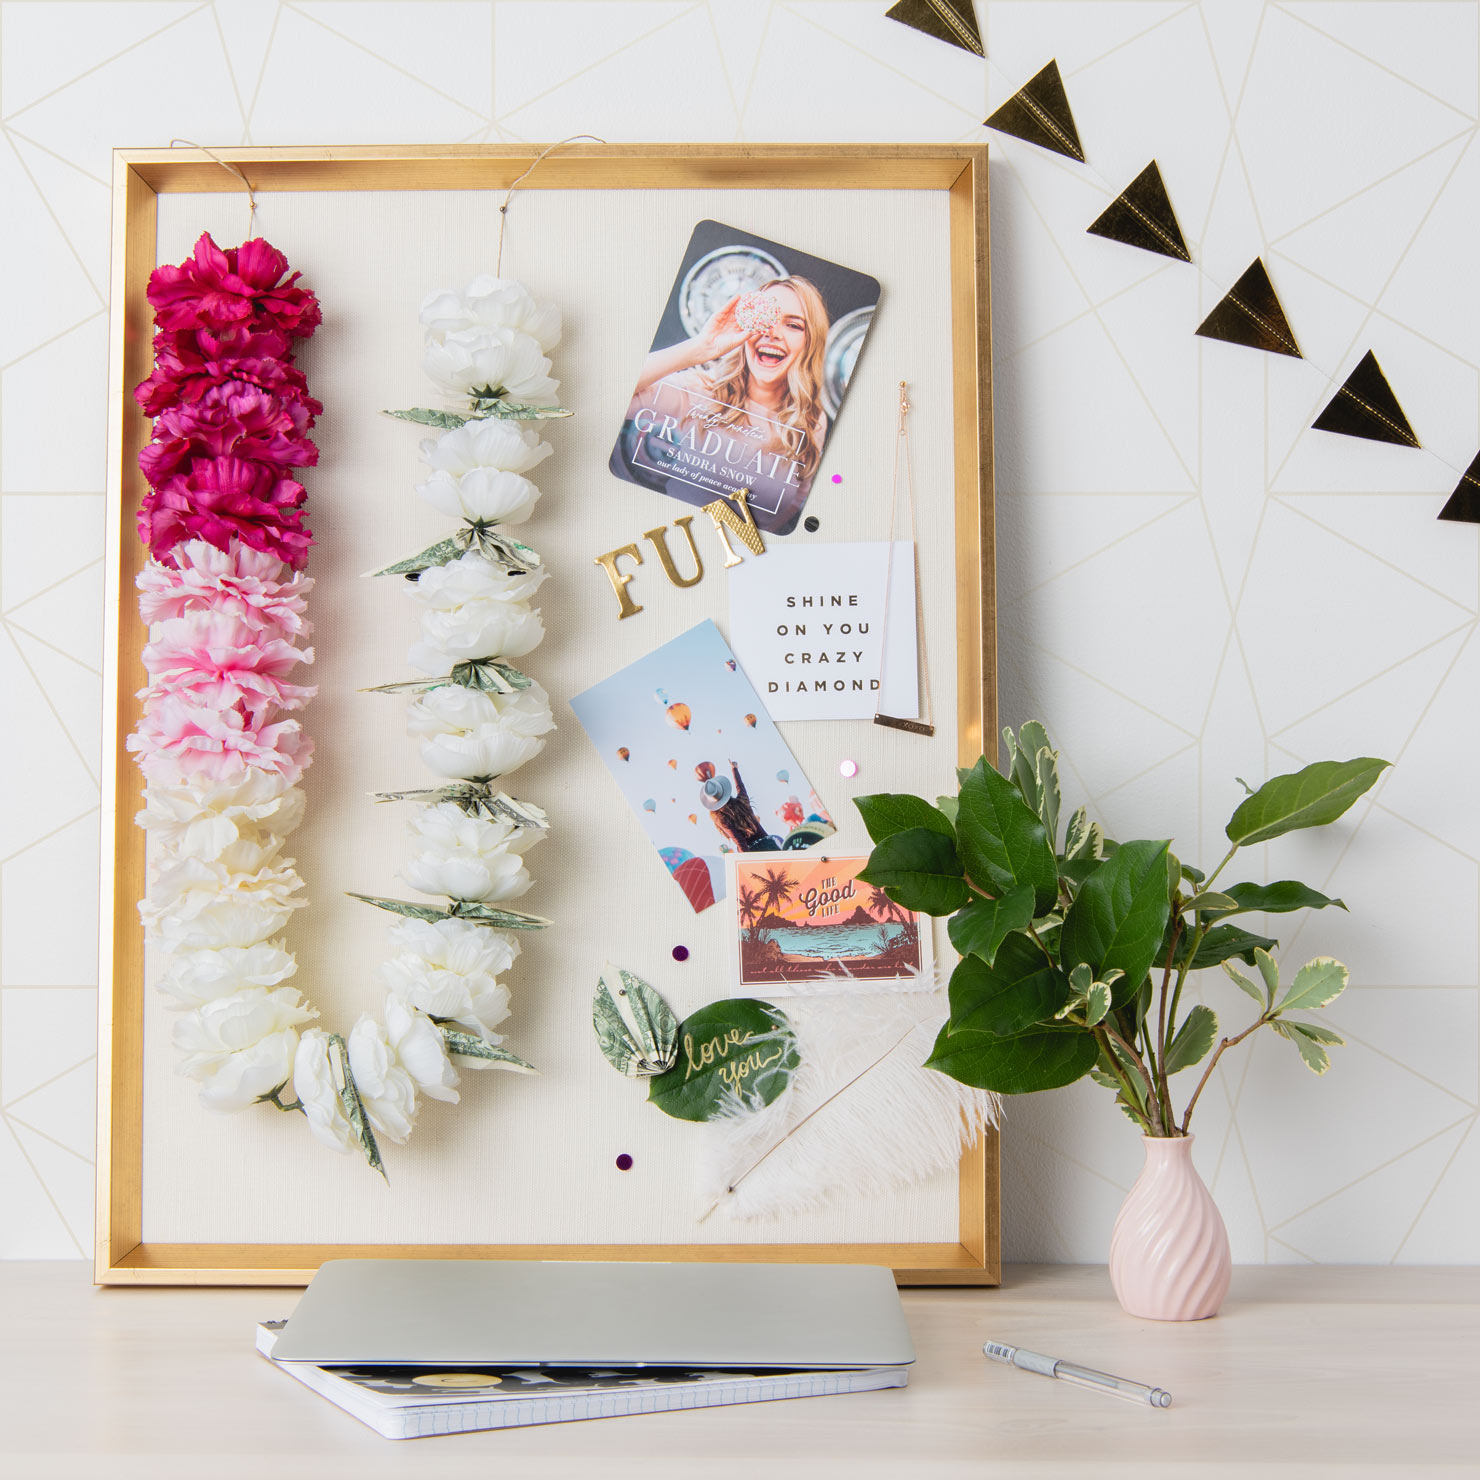
Step 15: Wear, enjoy and cherish it for years to come.

Now that you know how to make a graduation money lei, you’ll want to make one for everyone you know who reaches this important milestone — including yourself. Check out our graduation cap ideas for another fun and memorable memento!
If you make it for someone, think about how you’ll present your graduation money lei. Perhaps you can place it in a roomy box wrapped in tissue paper to protect the delicate work. Also, consider including a heartfelt card with a personal message and a graduation quote or saying — something to inspire them as they start their new journey.


Последние публикации


Отзывы (0)